1/72 A Conversion of the Rereleased "Airfix"WWI British Artillery into a WWI 13pdr
Dated: February 18, 2010.
When I did my last conversion a number of Hat Forum members asked if I could look at the rereleased British WWI RHA & see what was doable to get a good 13pdr out of it. Well here is my attempt! I have focussed on the 13pdr's key visible features. I have also tried to keep things simple & avoid fiddly. Additionally, I have done my best to keep as much of the original model as practical. Due to these considerations each stage needs photos from several angles to illustrate things.
Stage I. This looks at the additional pieces needed & the cuts to be made to the original model.
The Additional Pieces.
· Rod 2mm diameter & 11mm or 12mm long
· 4mm diameter tube section 3mm long
· Rod 2mm diameter & 4mm long
· 2.4mm wide U channel section 9mm long
· 4 strips of 1mm wide (0.4 mm thick) strip each 16mm long
· Some fine brass beading wire
The cuts / changes to the Model
There are two areas painted Yellow both these when cut off need to be kept as they have s use in the conversion!
1st yellow area is the front 3mm of the recuperator over the gun tube. This will form part of the new breech. See pic below.
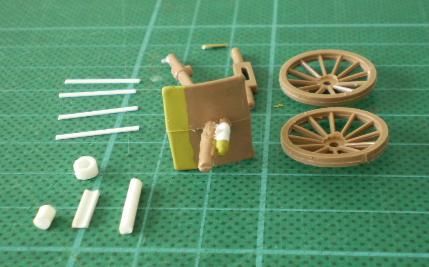
2nd yellow area is the bottom 4mm of the model's gun shield. Looking at pic below it is from just under the spur for the axel tree. This becomes the new top section of the gun shield.
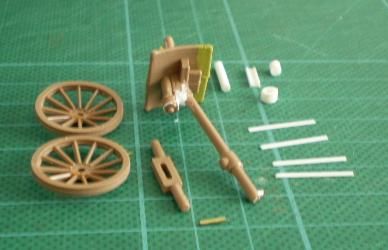
The 3rd section to be kept is the Pole Trail (though I haven't bothered to mark it with paint). This will need a further cut to realign it before pinning back on.
Next are the areas painted White, these are cut off & discarded. Please look at all pics below to see these.
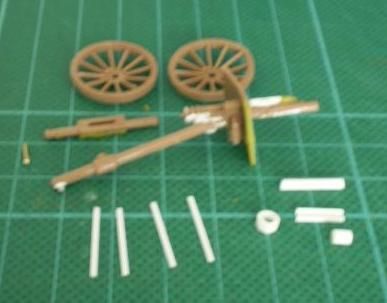


1st Remove all but the last 3mm or 4mm of the recuperator over the gun tube forward of the gun shield. This needs to be done all the way through the flat section representing the barrel slide track. See pics below.


Pics below show the area where the trail joins on the model. There is a white line at the top of the trail - cut through here.


Then cut out the white "square" just under the back of the recuperator. You need to be careful as the elevation wheel is moulded on the opposite side! A "new" breech section will fit into this space.
Next, the final of the 3 rings around the back of the recuperator needs to be shaved off - there are only 2 on the actual gun.
Finally cut off the towing pin under the pole trail. When finished the conversion is rather nose heavy so needs the trail to sit flush.
Making up the components.
· Fit the 11/12mm section of rod into the section of 4mm tube, glue. After it is dry cut off a "bottom" cord of the tube flush with the rod. This forms the basis of the new forward recuperator section. The wider section of Tube represents the bright metal fitting just behind the "rope wrapped" section on the gun.
· To produce the effect of the "rope wrapped" section on the gun, tightly wind brass beading wire along the rod section stopping approx 2mm short of the end. To start this process I glue the start of the wire onto the flat section under the tube. I find that I mostly need to do a double wind (compressing periodically) to get the right density & thickness. To finish I run the wire end back along the bottom gluing back under the tube flat section.
· Glue the salvaged front 3mm of the recuperator to the 4mm section of Rod. This is the "missing" bit of the barrel & the breech piece.
· Take the 2.4mm channel section & cut an angle from half way along to half way down the width. This forms the breech ejection guard - stopping ejected cases collecting the gun layer.
· Finally re-cut the Pole trail end to approx 67 degrees. Drill the new cut & drill the base of the gun - approx a third of the way between the spur (for the axel) & the cut rear.
Stage II. This shows the completed components around the cut down model.
Fitting the components
· Glue the "old" base of the gun shield to the top. Let set then add the four 1mm strips down the front face - starting with the Outside pair. I found that it was necessary to crimp a curve into the strips to get them to fit the profile of the gun shield. Unless you are particularly dexterous I suggest waiting till the outer pair set before doing the inner pair.
· Fit and glue the new recuperator section above the barrel, some additional trimming may be needed to get it to sit well.
· Fit & glue the breech section under the rear of the recuperator. It needs to fit so that the salvaged piece is just to the rear of the recuperator. It can be pinned but this is fiddly & should be unnecessary once the guard & trail are added.
· Fit & glue the breech ejection guard to the left side so it fits just behind the elevation wheel moulded on the original model.
· Pin, fit & glue the trail back on. I find that this works better if I put the pin in the Gun Model, fit the trail on it at right angles to the model, apply glue & then rotate the trail into position.
The cuts done and recuperator built.

The cuts done and components ready side view.

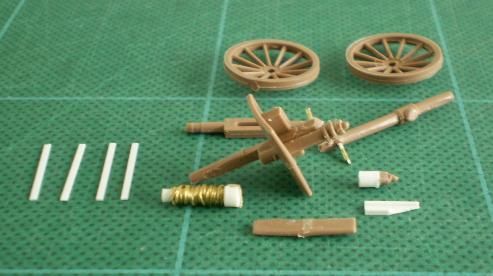
The cuts done and components ready rear view.
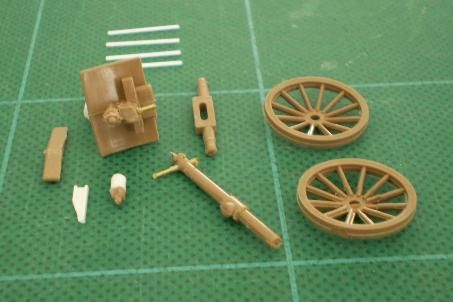
Stage III. This shows the completed conversion.
Things Not Done & Why.
· There is a lower section to the gun shield, which sits folded up under the axel tree. As I have yet to see a photo with this section deployed & it can't otherwise be seen I have left it off.
· Gunners' seats & wheel brakes. On the 13pdr the Gunners' seats & wheel brakes are on a skeleton frame attached to the top & bottom of the pole trail. I could not get this frame to attach in a sufficiently robust way so left them off.
· Sights, these are very fine & fragile. Plus the sights cannot normally be seen on the model in a war-game, so were an unnecessary complexity.
· There are two fins / rings on the back of the gun tube just as on the recuperator, however they were too fine for me to make & fit so…..
Completed - front view.
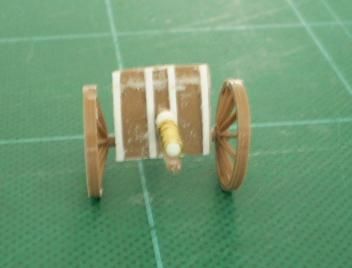
Completed - rear view.
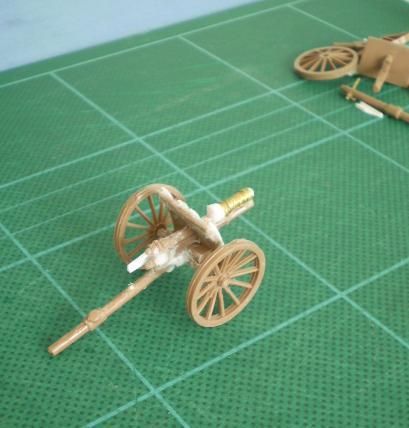
Completed - right quarter view.
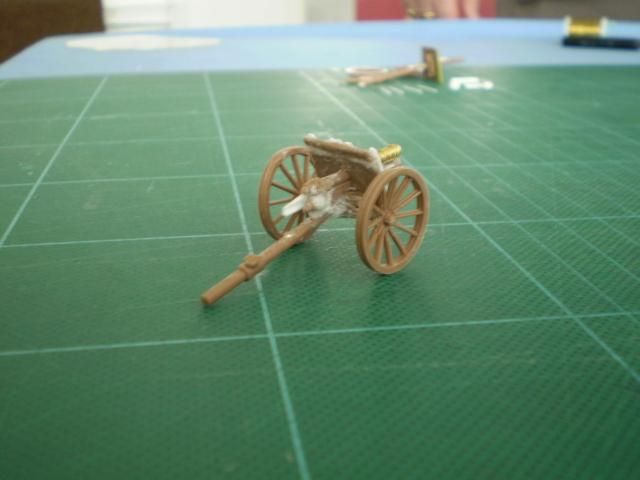
Completed - left quarter view.
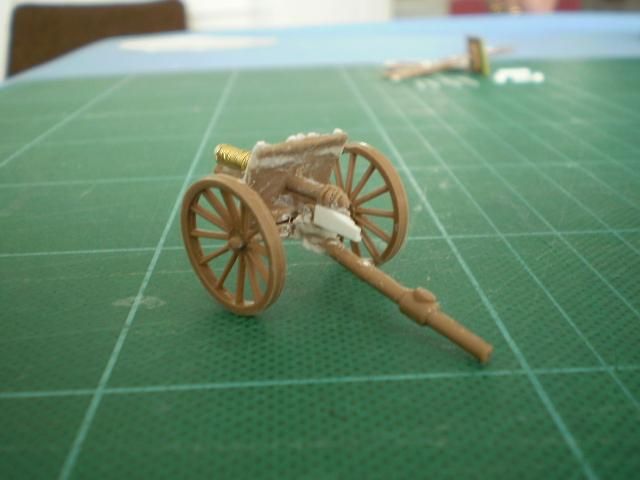
Hope this meets the needs of those who requested it & any one else looking for a WWI 13pdr for their Imperial Horse Artillery.
All comments, suggestions & improvements welcome.
Regards
Brennan Tate
New Zealand
Many thanks to Mr. Tate.