French Wurst Wagon step by step
November 18, 2007.
Making the French Wurst Wagon step by step
By Sander van Straeten
The Netherlands
Part 1 - First stages
Step 1
First we remove the parts from the sprue. To do this I use a sharp craftknife and a cutter as shown on the photograph.

Step 2
When all parts are cut loose check whether you have everything complete and clean off any mouldlines and flash (which on most HäT products is minimal).

Step 3
Now take a little bowl and mix some water with whatever you (or your better half) use for dishwashing, and drop all the parts in! The plastic may have some mould- or handgrease on it and that makes painting hard so we'll have to rinse that away.

Leave it standing for a while, half an hour should be enough,and then rinse all the excess soap off.
Step 4
Then put all the figures on some kitchen towel or paper hanky so it can dry. Do this for a longer period. I usually let the parts dry overnight.

When all the plastic parts are dry you can commence the next phase: dryfitting, glueing and mounting!
Part2 - getting down to business!
Step 5
While you can see I have my glue at hand the first thing I will do when the parts are dry is dry-fitting them. This means putting all parts together to see whether their fit is good enough to be glued together. Sometimes you need to widen a hole or cut down a peg (no pun intended) or two so that a wheel or shield fits on the receiving structure or figure.

Step 6
If it all fits like you want it to you can glue all the parts and give the figure it's final shape. In the case of the Wurstwagon I chose to leave the limber and the wagon itself apart so that I can change the direction of the vehicle when painted. Glued together it looks something like this:

To be honest: it helps to have some reference pictures at hand, because (as you can see) I put the wurstwagon's box the wrong way round on the carriage...sorry! Still looks good if you ask me.
I left the horses off as well in order to grant me better access when I paint them.
Step 7
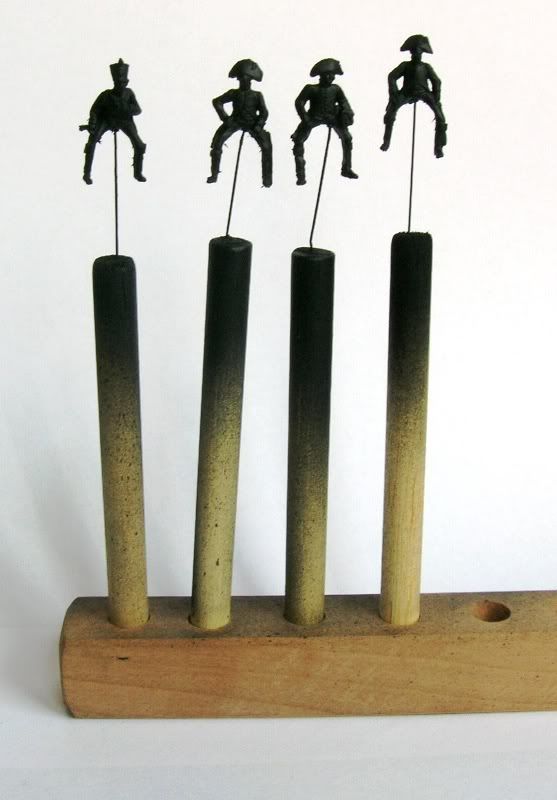
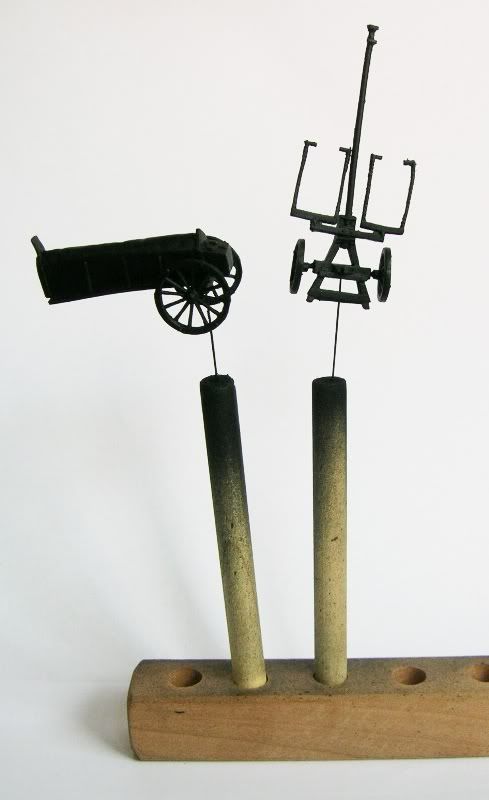
Just so I can get to all the areas I want to paint I mount my figures on homemade pins or on top a shaving foam-canister-lid (what a mouthfull!) To do this I take a figure, in this case the riders, and a pin made of some wooden dowel and some wire. I then take a candle and heat the metal wire which when warm enough is pushed in the figure.

For this I usually try to find a spot on the figure which does not show up when it is painted like the bottom of riders and the underside of a foot figure's base.

Part 3 - Let the Painting begin!
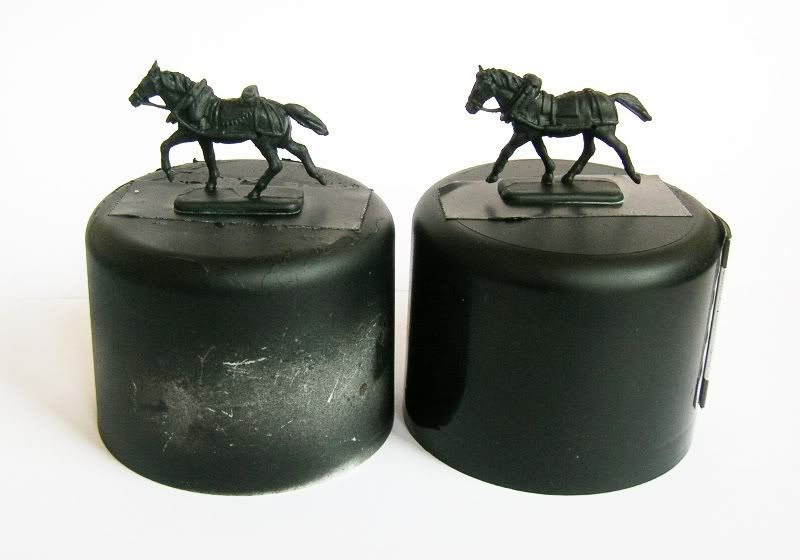
When all the parts are mounted I take them outside (or to another well-ventilated area) and use a Games Workshop Chaos Black spraycanister to get a good undercoating.
step 8
The riders:
The limber and the Wurst wagon itself :
The horses were placed on lids by using two sided sticky tape.
Step 9
The painting itself is made easier by the rods and the lids because you can rest the lower fingers of your painting hand on them while you paint to reduce trembling. Also it allows you to paint the figure without touching the still-wet paint you just applied to the figure and so maikng sure you do not get your fingerprints on it.

Step 10
When painted the kit look like this:

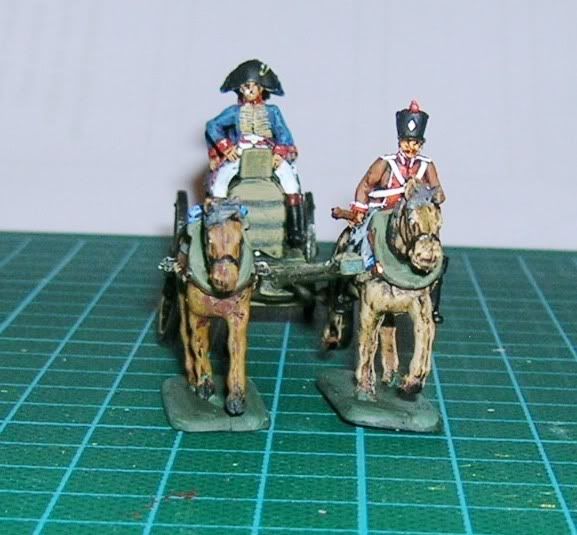
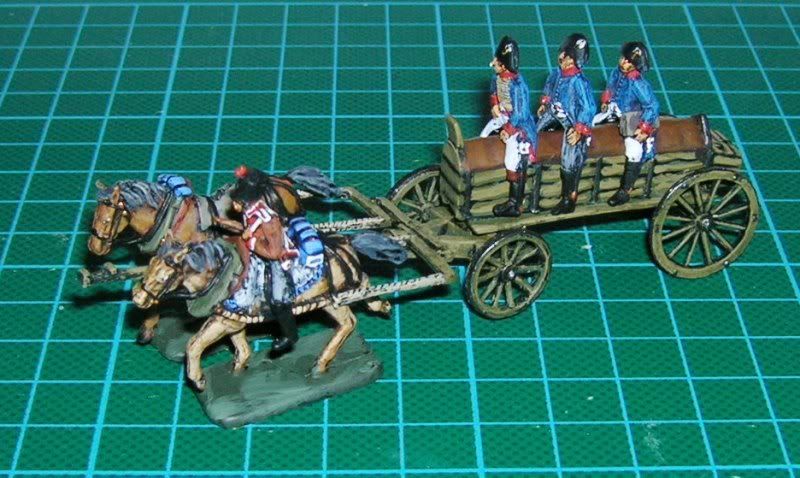
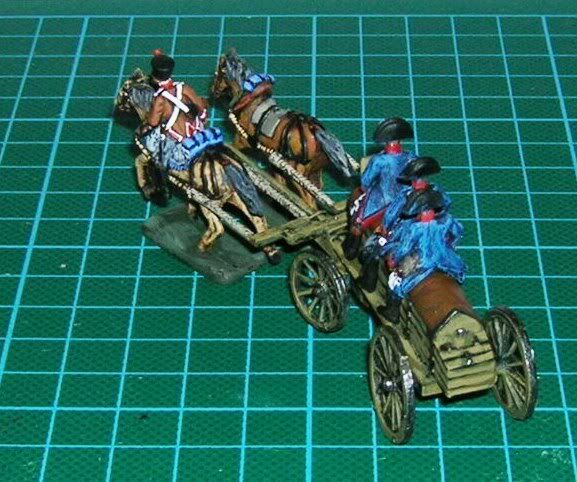
Take extreme care when you are putting the horses, riders and wagon together because the paint can easily be scrapped off if you're too rough.
Finally my Wurstwagon is finished and ready for the ETS-pages. If you want to use it for wargaming you'd best to put it on a base, you can make one yourself easily from plastic card or use a ready made one from several manufaturers.
Enjoy!
Many thanks to Mr. van Straeten.