Limber
Dated: March 4th, 2009.
This sequence shows how to assemble a small limber using parts from the WW I German Artillery and from the WW II German Mounted Infantry.
Two limbers were made, one for the 1st World War and another for tutorial purposes for the 2nd World War. This model of limber and the FK16 are compatible with both wars because the gun was renewed in the 30's to accept 75 mm ammo and kept in service until, ate least, 1944.
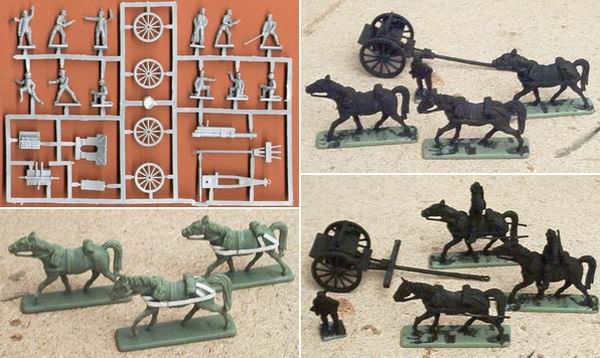
The first image is a set with four pictures, including the base assembly and preparation.
1. The only part that needs some previous assembly, before this sequence, is the limber. This model includes just six parts, including two wheels, base, upper structure, towing bar and the rear panel that can be glued opened or closed.
2. Cardboard strips, cut form the box, were glued in place to depict the correct harness for horses pulling limbers. The only glue used with these figures was the cheapest instant glue I could find.
3. All parts receive a black basecoat with acrylic paint. This particular paint is from Tamyia, but any can be used without problem, providing that all parts are previously cleaned with detergent.
4. The towing ropes are already in place. These are made in metal wire intended to hang frames in the wall. The main advantage is that take glue very well and keeps the shape, including any bends or turns.
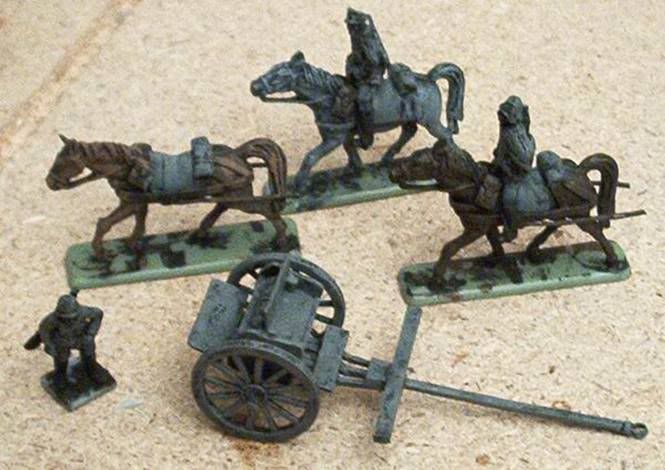
The second image show the assembly after the first layer of paint is dry brushed with an n║3 Humbrol brush. No details are painted, but two or three layers of paint, every time clearer are needed to show details.
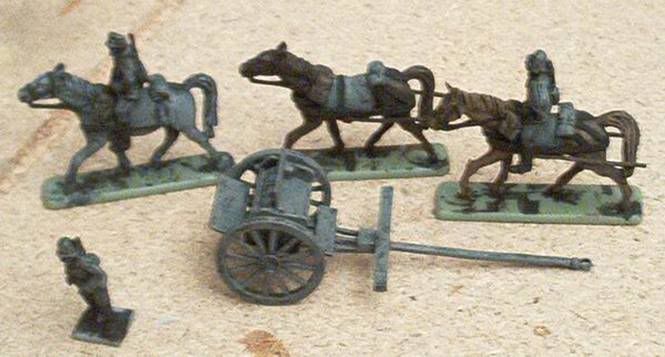
The next image already shows the first details are painted, including harnesses, belts, boots and most items that don't require too much attention. Base flesh can also be dry brushed by now to help define painting or specific colors.
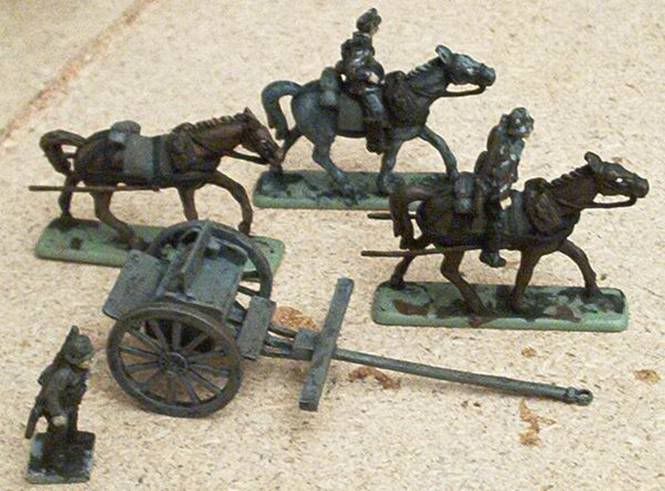
In the fourth image, more details are painted, including eyes, guns and every small part. The foot soldier was made with the remaining parts of butchered figures, being the lower part provided by the 1st World War mounted officer and the upper half from a 2nd Word War mounted soldier.
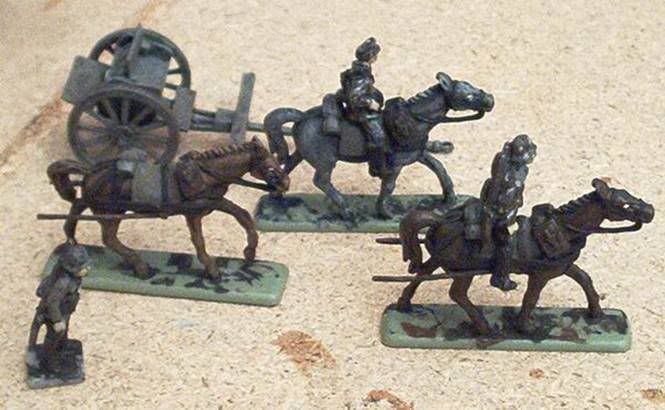
All details that can be done before the final assembly are already painted. The limber already have the extra bar to provide attachment points for the ropes and a small cardboard strip to unite the horses and the bar near the saddle. This strip is visible in the picture from above near the soldiers left foot.
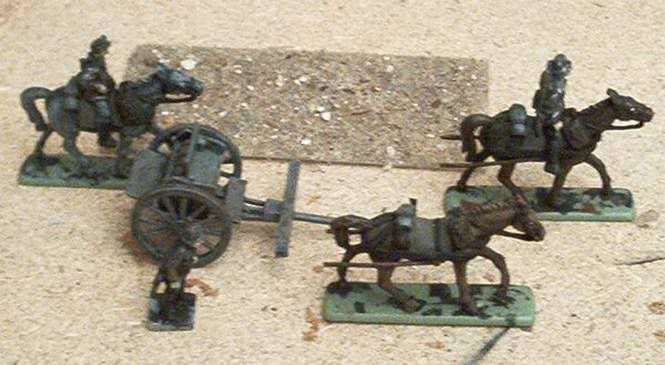
The sixth image also includes the base which is just a plastic part from an old box with dust glued by white glue. After dry, is possible to use a matt varnish spray to help keeping all the dust in place. The figures still have the original base, but soon it will be removed before being glued in the new base.
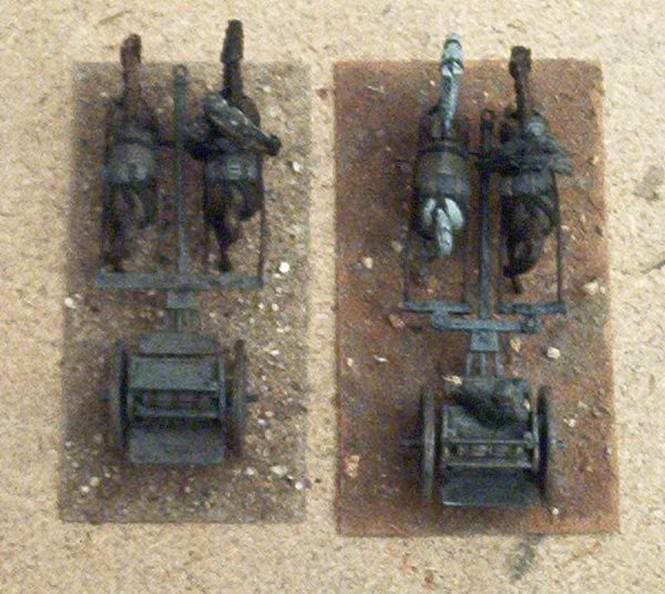
It is possible to choose different attachment methods and the seven images, taken from above show the difference between them. One limber have a double system and the other a more simple attachment with the harnesses from both horses attached to the same part.
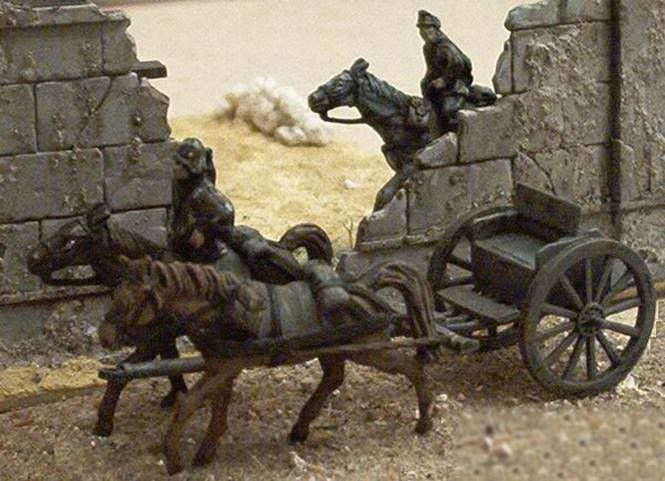
The final result of the 2nd World War limber, with details already painted and a horseman near. The gun must be modeled with the supplied crew or with a 2nd World War crew, made from modified figures or kept in reserve until Hat release any of the new German artillery models.
Cheers
Nuno M. Cabešadas
Portugal
Many thanks to Mr. Nuno M. Cabešadas.